Saturday, March 12, 2011

Putting up Texas Tomato Cages

Today is Transplant Day for the Cherry Tomato Plants that I started 2 months ago (see this blog entry).

The first step was to put up the Tomato Cages that I had put away at the end of last season.

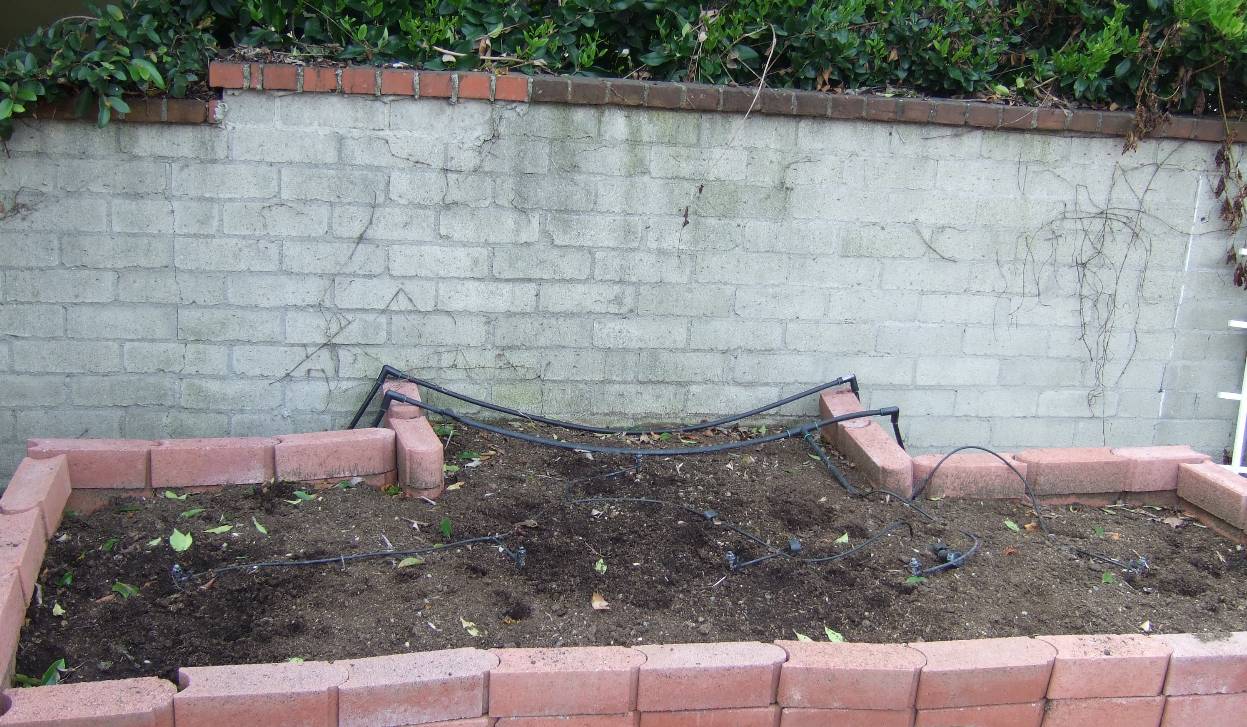
The picture below shows one of the Raised Beds that I created to grow Cherry Tomatoes. I had taken down the Tomato Cages and fertilized it about 5 months ago (see this blog entry)
I use Texas Tomato Cages as my primary Tomato Cage. The best things about these Tomato Cages are that they are tall (8 feet) and are easy to put away and store. The picture below shows how nicely the cages fold for storage.

This will be the third year that I have used Texas Tomato Cages and they are a lot better than the Tomato Cages that I used before (see this blog entry)

The Texas Tomato Cages are made up of 3 pieces. The picture below shows how three Texas Tomato Cages at different stages of assembly.


The picture below shows the finished product. It took me about 15 minutes to put everything together.

Combining 12 Tomato Cages into a Mega Tomato Cage

I love using Texas Tomato Cages (see this blog entry).


Unfortunately, they are expensive and come in a six pack. I have seven spots in my garden that I want to use to grow Cherry Tomatoes, so I was short one Texas Tomato Cage.

I have a lot of Tomato Cages that I had bought from Home Depot that were lying around, so I decided to combine them to create a "Mega Tomato Cage".

The picture above shows the area in my garden that I will use to build my Mega Tomato Cage.

The picture to the right shows one of the Home Depot Tomato Cages. It is about 4 feet tall, about 1 feet of which is buried in the ground.

I have grown Cherry Tomato plants that were over 8 feet in height, so you can see how inadequate these Tomato Cages are.


To compensate for the lack of height of these Tomato Cages, I sit one Tomato Cage on top of another and tie this together using cable ties.

I put one of these combined Tomato Cages in the middle and surround it with 5 more combined Tomato Cages.

I tie the whole thing together with more cable ties so that the wind and the weight of the Cherry Tomato plant does not topple it over.

The picture to the right shows the finished product. It does not look pretty, but it show be tall enough and sturdy enough to support a Cherry Tomato Plant

Transplanting Cherry Tomato Seedlings

My Sun Gold Cherry Tomato Seedlings (see this blog entry) are tall enough that they are ready to place into the ground. I think that the weather is warm enough that the plants will not get damaged by any cold weather.

In a previous blog entry, I showed how I put up the Texas Tomato Cages.

In this blog entry, I'll show you how I transplant the Cherry Tomato Seedlings.

The picture to the right, shows the area of my Raised Bed that I plan to put the Cherry Tomato seedling.


The first thing I do is to dig a hole about 1 feet deep and wide enough so that I can put in a 4" container.


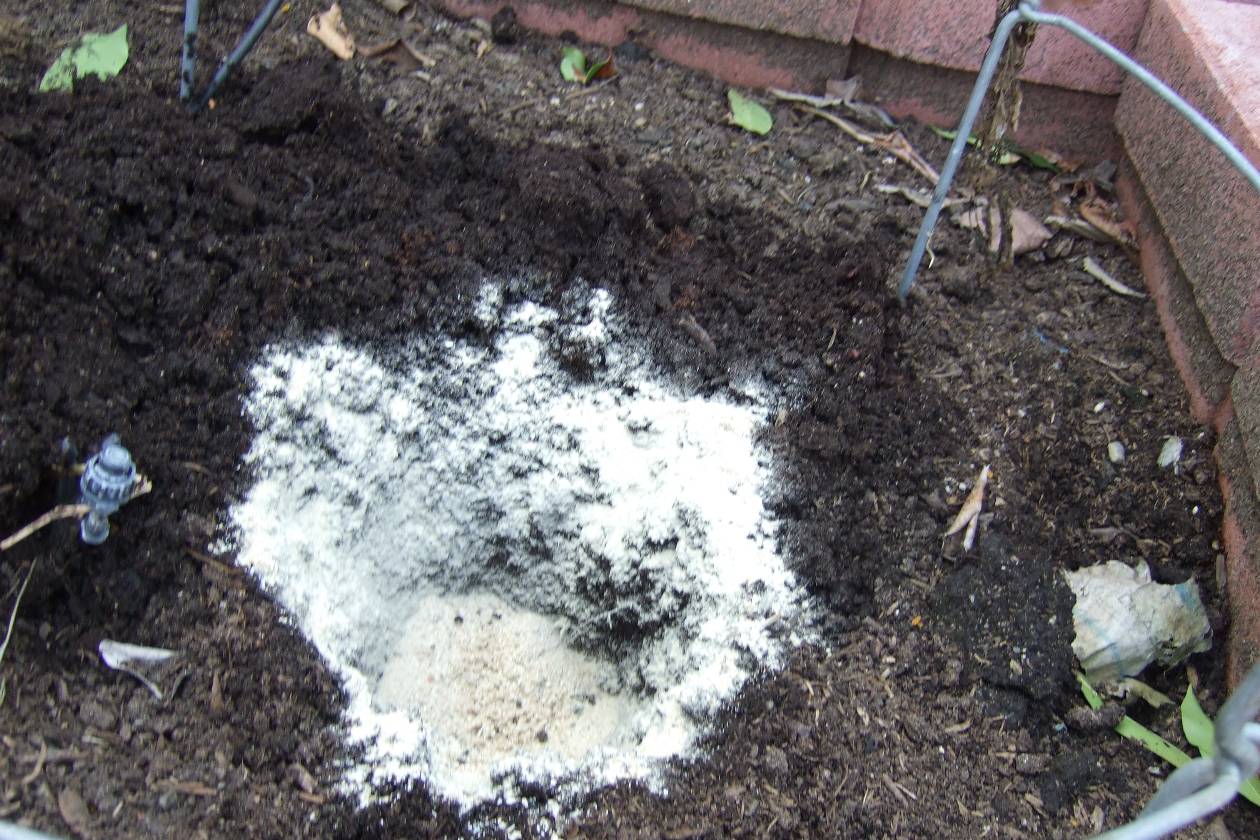
I then pour a cup of Fish Bone Meal into the hole and along the side.

Fish Bone Meal is very high in phosphorous, which is an essential element that enables plants to produce flowers. You can use Bone Meal instead of Fish Bone Meal if you want.


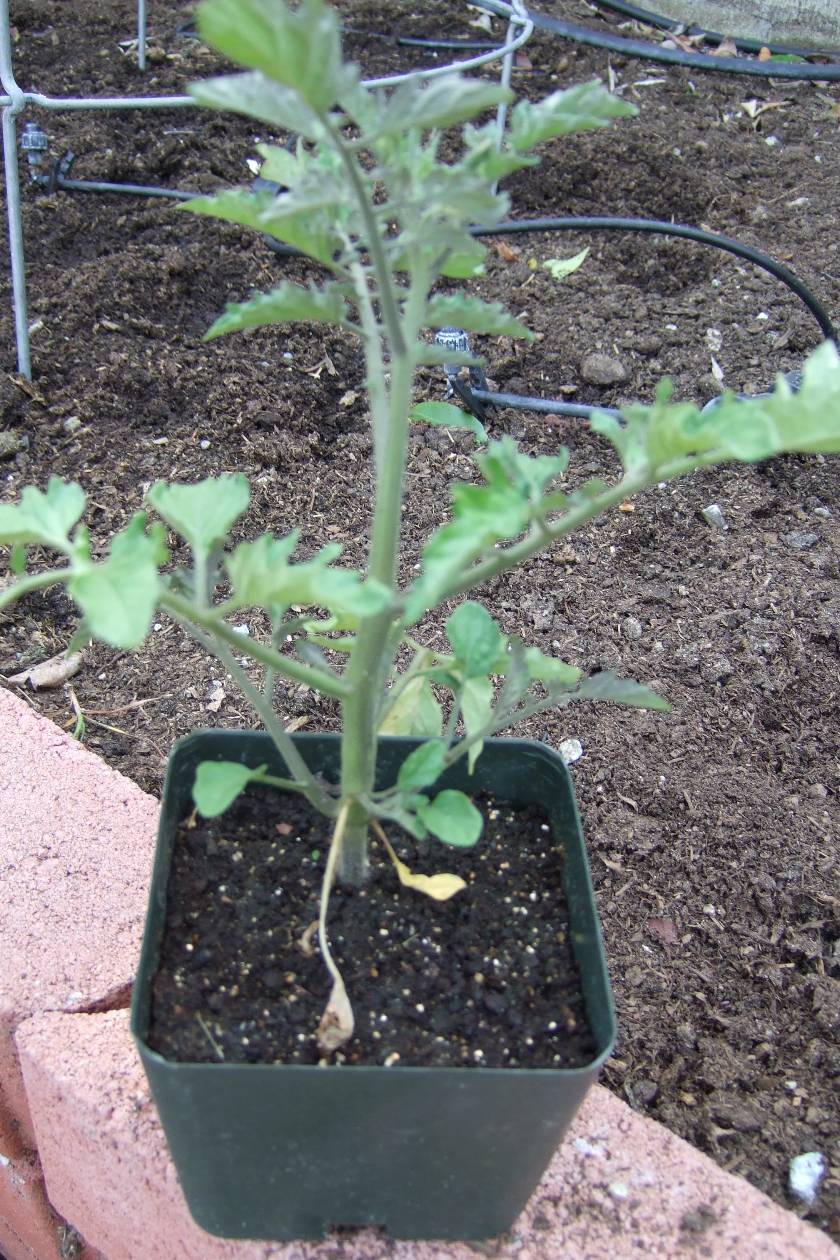
The picture to the right shows the Cherry Tomato seedling that I want to transplant.


There were a couple of side shoots near the bottom of the seedling. I cut off these side shoots (see picture to the right) since they were going to get buried and used them to clone additional Cherry Tomato plants (see this blog entry).


The picture to the right shows the root structure of the seedling.

You can see the roots just beginning to curl at the bottom of the container.

This tells me that this is the right time to transplant the seedling. If I wait too much longer the roots will cover the outer edge. This would constrain the roots from branching out and get nutrients for the plant.


I put the seedling into the hole.


The picture to the right shows how the seedling looks after I cover up the hole with dirt.

It is half the height as before. I plant the seedling this deep to ensure that the plant develops a good root structure.

Cherry Tomato Plant Spacing

For the past several years, I have struggled with how many Cherry Tomato Plants to put into my 10 foot long Raised Bed.

Two years ago, I packed 5 Cherry Tomato plants into this Raised Bed (see picture below)

This was not a good idea.

One of the Cherry Tomato plants got diseased and since the plants were so close together, the disease spread. You can see brown and curled up leaves on the plant to the far right in the picture above.

In order to save my Cherry Tomato crop, I had to destroy two of the Cherry Tomato plants.

Last year, I decided to spread out the Cherry Tomato plants and only put 4 plants in the Raised Bed. As you can see in the picture above, the branches of the Cherry Tomato plants spread out and soon intermingled. Fortunately, none of the plants developed any disease, but the plants were too close together.

This year, I am spreading the Cherry Tomato plants further apart and am only putting 3 plants int the Raised Bed (see picture below). This gives 2 feet of separation between each Cherry Tomato plant.


Cloning a Cherry Tomato Plant

I gave some of my Sun Gold Cherry Tomato seedlings to my spouse's co-workers. Unfortunately, there were more co-workers than there were available seedlings.

When I was transplanting my Cherry Tomato seedlings (see this blog entry), I noticed that a couple of the seedlings had side shoots near the bottom (see picture to the right).


Since these side shoots were going to get covered with soil, I decided to cut them off and use them to clone more plants for my spouse's co-workers.

The picture to the right shows one of the side shoots in my hand.


The picture to the right shows the side shoot in a 4" container.

As long as the soil mixture stays moist, the side shoot will develop roots and will create a new plant.

Sunday, March 6, 2011

Shriveled Winter Melon Seedlings

The picture above shows Winter Melon seedlings that I started in early February. I started 8 seeds and all germinated.

Unfortunately, the weather is too cold for them. Four of the seedlings have already died.

The ones in the picture germinated last.

I bring the seedlings inside at night, but they need warmer weather.

I started another set of seeds today, in case these die as well.

Two Month Old Cherry Tomato Seedlings

It's been two months since I started my Sun Gold Cherry Tomato plants (see this blog entry) and they are doing very well.

The weather in February was to cold to leave plants out overnight. In the early morning the temperature can drop down to the high 30'sF/low 40'sF.

Depending upon the weather, I have been either leaving the plants outside during the day or putting them on a window sill facing the sun when it is cold.

I am hoping that the weather warms up enough that I can transplant the plants soon. Last year, I was able to start transplanting in mid March (see this blog entry)


Sunday, January 30, 2011

Cherry Tomato Seedlings


All of the Sun Gold Cherry Tomato seeds that I started two weeks ago (see this blog entry) have germinated.

This is the highest germination rate that I have ever archived.

In the picture above, you can see that the Sun Gold Cherry Tomato seeds did not germinate uniformly. Half of the seeds germinated at the end of the first week. The others germinated over the next several days. The last seed took 12 days to germinate.

Saturday, January 15, 2011

Seed Starting 2011


Today, I started my seedlings. This is about 2 weeks later than I have done in the past (see this blog entry).

Last year, we had a very wet and cold first months of the year. As a result, my seedlings did not develop (see this blog entry).

Since we had a wet and cold December, I did not want to take any chances that this year will be a repeat of last year. As a consequence, I am dividing my seed starting in phases. Today, I started my Sun Gold Cherry Tomatoes. Next month, I will start my Winter Melons. In March, I plan to start my Sweet Baby Girl Cherry Tomatoes.

I am planting a lot less variety of seeds than I have done in the past (see this blog entry). This is a matter of economics (see this blog entry). I have limited space in my garden and I get the most return from planting only Cherry Tomatoes and Winter Melons.

Another change from the past is that I am using regular 4" square pots instead of the APS-24 and APS-6 units. Since I am only planting 8 seeds, it did not make sense to use the APS-24. I also don't have to deal with Algae problems (see this blog entry). I just have to be disciplined to water the pots regularly, as the biggest benefit of the APS units is that they are self watering.

Sunday, November 14, 2010

Harvesting Okinawan Sweet Potatoes

About seven months ago, I planted some Okinawan Sweet Potato vines into 7 half whiskey barrel containers (See this blog entry).

I decided this morning to see if there were any Okinawan Sweet Potatoes in one of the containers (see this picture to the right).

This is approximately the same that that I harvested Okinawan Sweet Potatoes last year (See this blog entry).

Last year, I had a very difficult time restarting the Okinawan Sweet Potato vines after I had completed the harvest (see this blog entry). This was primarily due to the cold weather at this time of the year.


This year, I wanted to be as non-invasive to the Okinawan Sweet Potato plants as possible. So instead of cutting away all of the leaves and vines as I did last year, I just flipped the container over a bunch of old news papers.

You can see all of the Sweet Potatoes cluster along the outer rim of the soil mix in the picture to the right.

Instead of destroying the root structure and get all of the Sweet Potatoes in the container, I only harvested the Sweet Potatoes on the outer edge.

The picture to the right shows all of the holes left by the Okinawan Sweet Potatoes that I harvested.

I am sure that there were Sweet Potatoes in the middle of the container, but I could not get at them without tearing everything apart.

I also left several small Okinawan Sweet Potatoes that were not worth harvesting along the outer edge.


The picture to the right shows my yield from this container. Last year, I harvested bigger Sweet Potatoes. I think this is due partially to the abnormally cold summer we had in the Los Angeles area this year.

I am going to wait another month or so before I harvest another container. Hopefully by then, the Sweet Potatoes will have grown bigger.


When I was done, I put the container back over the Sweet Potato plants and flip the soil mix back in.

The picture to the right shows how the Sweet Potato plants look after everything was done. You really can't tell the difference from the picture at the top.

I am very happy with this modification to last year's procedure.

I avoid the trouble of restarting the Okinawan Sweet Potato vines during winter and hopefully I can get another harvest from this container in another 6 months or so.

Sunday, October 3, 2010

Fertilizing the Cherry Tomato Raised Bed

The 4 Sweet Baby Girl Cherry Tomato plants that I grew in my biggest Raised Bed have finally given out. This is roughly the same time as last year that the Cherry Tomato plants died (see this blog entry)


I spent about 2 hours removing the plants and taking down the Texas Tomato Cages.


The picture below shows how the Raised Bed looked like after I had cleared everything out.


One of the reasons why my Cherry Tomato plants grow so well and produce so many tomatoes is because I replenish the soil every year. I put natural fertilizer and manure into the Raised Bed and let it compost for 4 months, so the plants have access to a lot of nutriets.

This year, I am using Alfalfa Meal as my main natural fertilizer. Last year, I used Soybean Meal. Soybean Meal is richer (N-P-K ratio of 7-2-1) than Alfalfa Meal (N-P-K ratio of 3-1-2), but costs almost 1.5 times as much. With the recession, I wanted to save a little money and used Alfalfa meal instead.


I buy my Alfalfa and Soybean Meal from Kruse Feed & Supply in La Habra, CA. A 50 lb bag of Alfalfa Meal costs about $17 from Kruse Feed & Supply. A 50 lb bag of Soybean Meal costs about $25. I typically use about a quarter of a 50 lb bag to fertilize this Raised Bed.


The picture below shows the Raised Bed with a layer of Alfalfa Meal on top of the old soil.


I put a layer of newspapers (see picture below) on top of the Alfalfa Meal to prevent weeds from sprouting.


Next, I put another layer of Alfalfa Meal on top of the newspapers.


Lastly, I put a thick layer of composted Steer Manure as the final layer. I used 10 bags of 1 cu feet composted Steer Manure. I bought the bags from Home Depot for about $1 each.

The picture below shows the final result. You can see the soil is several inches higher than before. I always put the soil up to this level every year, so you can see how much soil is "consumed" each year. I don't step on this Raised Bed, so the soil loss is not due to compaction.

October Sun Gold Cherry Tomatoes

Today, I was able to pick my first Sun Gold Cherry Tomatoes from my second batch of Sun Gold Cherry Tomato plants.

The timing was excellent, as I had just cleared away my Sweet Baby Girl Cherry Tomato plants (See this blog entry).

This is the first time that I have tried growing Cherry Tomato plants in the Fall. I have tried before, but usually the Summers are too hot and cause my young Cherry Tomato plants too wilt. This year, we had a very mild Summer.

I started these plants from clones about 2 and 1/2 months ago (See this blog entry).

I currently have 4 Sun Gold Cherry Tomato plants growing. The picture below shows how they look today.

There are a lot of flowers and fruit on the plants. I am curious as to how long the plants will last before cold weather brings them down.


Sunday, September 12, 2010

September Strawberries

Ripe Strawberries!

2nd Batch of Sun Gold Cherry Tomatoes

My second batch of Sun Gold Cherry Tomatoes are doing very well.

The picture to the right shows two of the four Sun Gold Cherry Tomato plants that I cloned a little over 6 weeks ago (see this blog entry).

The plants are almost 6 feet tall and are producing a lot of flowers. Now that the weather has cooled down, I am get the flowers to set. I hope to have Sun Gold Cherry Tomatoes ready to eat in a few weeks.

The picture below shows the Sweet Baby Cherry Tomato plants that I planted 5 months ago (see this blog entry). The fruit production from these plants have slowed down. It is too late in the year to try to plant another crop in this area, so I am just going to let them keep growing.


Sunday, August 1, 2010

Cloned Sun Gold Cherry Tomato Plants

Last week, I replaced my two Sun Gold Cherry Tomato plants. The Sun Gold Cherry Tomato plants started to drop off fruit production a few weeks ago (see this blog entry).

From my past experience with Cherry Tomato plants (see this blog entry), I find that once the plants stop producing and it's mid-summer, it's time to put in new plants.

The picture above shows two Cherry Tomato plants that I cloned from the original plants (see this blog entry).

Hopefully, I'll have new Sun Gold Cherry Tomatoes ready to pick in late September.

Sunday, July 18, 2010

Why it does NOT make sense to plant Sweet Corn in my backyard garden

It just does not make financial sense to plant Sweet Corn in my backyard garden.

I dedicated a small 3' x 3' area of my garden this year to growing Sweet Corn (see this blog entry). After about 3 months, I harvested 16 ears of Sweet Corn (see this blog entry)

The local supermarket sells Sweet Corn for $0.25 to $0.33 each, so this 3' x 3' part of my garden saved me $5.

In this equivalent area, I could grow a Strawberries or Cherry Tomatoes.

Strawberries are going for $3 a pound at the local supermarket. I can get a pint of Strawberries from a strawberry plant in a season and a 6 foot tall Strawberry Tower can hold 36 Strawberry plants (see this blog entry). However, this part of the garden only gets sunlight in the morning (there is a big hedgerow behind it that blocks the afternoon sun), so I can only have 20 productive Strawberry plants in this part of the garden. A pint of strawberries is about 0.75 pounds, so 20 Strawberry plants would yield 15 pounds of Strawberries per year or about $45 worth of strawberries.

In this same 3' x 3' area, I could grow one Cherry Tomato plant. A pound of Cherry Tomatoes goes for $5 at the local supermarket. Although I have not added up how many pounds of Cherry Tomatoes a plant can produce in a season, I did record how much Cherry Tomatoes my garden can produce in 1 week (see this blog entry from last year). I think 20 pounds of Cherry Tomatoes per plant is a reasonable estimate or $100 worth of fruit.

So, I can grow $5 worth of Sweet Corn, $45 worth of Strawberries or $100 worth of Cherry Tomatoes. I really cannot taste the difference between my backyard Sweet Corn and the supermarket Sweet Corn, but I can taste the difference in the Strawberries (mine are sweeter). As for Cherry Tomatoes, I cannot even find Sun Gold Cherry Tomatoes in the supermarket and in my opinion Sun Gold Cherry Tomatoes are the best tasting Cherry Tomatoes.

From now on, no more Sweet Corn in my garden.

I converted this area to growing Cherry Tomatoes (see this blog entry).

Saturday, July 17, 2010

Cloned Sun Gold Cherry Tomato Plant

With my Sun Gold Cherry Tomato plants starting to falter in fruit production (see this blog entry), I decided to clone additional Sun Gold Cherry Tomato plants.

I cut off the growing tips from a couple of branches of one of the the two Sun Gold Cherry Tomato plants and stuck them into the ground a couple of weeks ago.

The picture above shows how the cuttings look today.

I rooted 2 cuttings in case one of them did not survive .I am glad that I did this 2 weeks ago, as it has gotten extremely hot this past week (almost 100 degrees F during the day), and I doubt the cuttings who have taken root. Fortunately, the cuttings look in good shape.

This spot in the garden was used for Sweet Corn earlier. After I harvested the Sweet Corn, (see this blog entry), I decided to convert the area to Cherry Tomatoes for the rest of the season (see this blog entry for why)

I will transplant one of the cuttings to another part of the garden next week.

Thursday, July 15, 2010

Winter Melon Flowers Forming

This has been a very unusual summer in Southern California.

The mornings have been cloudy and the days cool. Last weekend, was the coolest July we had on record.

This weather has not been good for my Winter Melon plants. They flourish in hot weather.

Last year at this time, I had already harvested my first Winter Melons (see this blog entry).

This year, the flowers are just forming (see picture at the top).

The weather has turned hot the last couple of days. We have reached the 90s and more hot weather is on the way. This should make a difference.

Plumeria Transplants Doing Well

The Plumeria cuttings that I rooted 6 months ago (see this blog entry) are doing very well.

I gave away the original plant, but I kept the cuttings.

The picture above shows how the cuttings look today. There are lots of leaves and more branches are starting to form. No flowers yet, but I hope to see them soon.

Sunday, July 11, 2010

Harvesting Cherry Tomatoes


My Cherry Tomato plants are producing a lot of fruit. Although not as much as last year (see this blog entry).

This week marks a change over.

My Sun Gold Cherry Tomato plants have been producing fruit for the past six weeks (see this blog entry) and are starting to falter.

My Sweet Baby Girl Cherry Tomatoes were transplanted much later and are only now starting to produce.

The picture above shows my harvest from today. There are slightly more Sun Gold Cherry Tomatoes than there are Sweet Baby Girl Cherry Tomatoes. I think starting from now on, I will be getting a lot more Sweet Baby Girl Cherry Tomatoes.

The picture below shows how my Cherry Tomato plants look. The 4 on the left are Sweet Baby Girl Cherry Tomato plants and the 2 on the left are Sun Gold Cherry Tomato plants. All of the plants look the same height, because they are all supported by 8 feet tall Texas Tomato Cages (see this blog entry). However, the Sun Gold Cherry Tomato plants have branches that drape well over the Tomato Cages. If you look closely at the picture, you can see that the Sun Gold Cherry Tomato cages are starting to tip over from the weight of the branches that have draped over.