Saturday, March 12, 2011

Putting up Texas Tomato Cages

Today is Transplant Day for the Cherry Tomato Plants that I started 2 months ago (see this blog entry).

The first step was to put up the Tomato Cages that I had put away at the end of last season.

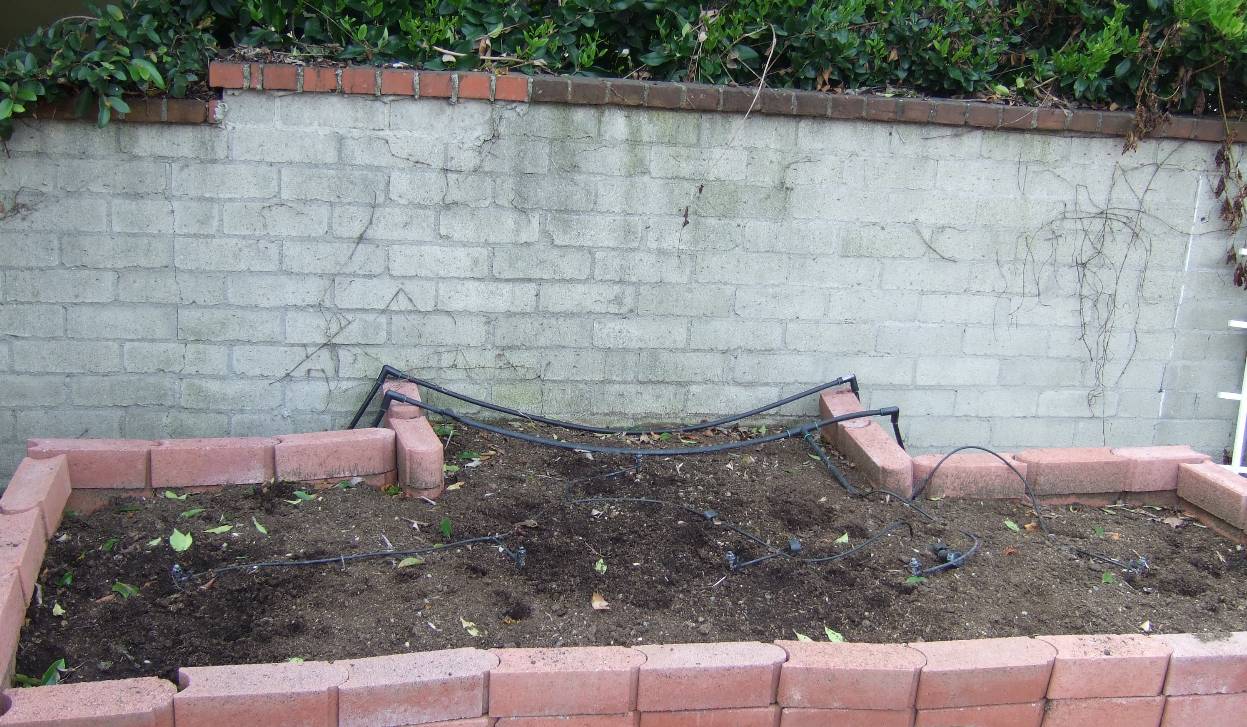
The picture below shows one of the Raised Beds that I created to grow Cherry Tomatoes. I had taken down the Tomato Cages and fertilized it about 5 months ago (see this blog entry)

I use Texas Tomato Cages as my primary Tomato Cage. The best things about these Tomato Cages are that they are tall (8 feet) and are easy to put away and store. The picture below shows how nicely the cages fold for storage.

This will be the third year that I have used Texas Tomato Cages and they are a lot better than the Tomato Cages that I used before (see this blog entry)

The Texas Tomato Cages are made up of 3 pieces. The picture below shows how three Texas Tomato Cages at different stages of assembly.


The picture below shows the finished product. It took me about 15 minutes to put everything together.

Combining 12 Tomato Cages into a Mega Tomato Cage

I love using Texas Tomato Cages (see this blog entry).


Unfortunately, they are expensive and come in a six pack. I have seven spots in my garden that I want to use to grow Cherry Tomatoes, so I was short one Texas Tomato Cage.

I have a lot of Tomato Cages that I had bought from Home Depot that were lying around, so I decided to combine them to create a "Mega Tomato Cage".

The picture above shows the area in my garden that I will use to build my Mega Tomato Cage.

The picture to the right shows one of the Home Depot Tomato Cages. It is about 4 feet tall, about 1 feet of which is buried in the ground.

I have grown Cherry Tomato plants that were over 8 feet in height, so you can see how inadequate these Tomato Cages are.


To compensate for the lack of height of these Tomato Cages, I sit one Tomato Cage on top of another and tie this together using cable ties.

I put one of these combined Tomato Cages in the middle and surround it with 5 more combined Tomato Cages.

I tie the whole thing together with more cable ties so that the wind and the weight of the Cherry Tomato plant does not topple it over.

The picture to the right shows the finished product. It does not look pretty, but it show be tall enough and sturdy enough to support a Cherry Tomato Plant

Transplanting Cherry Tomato Seedlings

My Sun Gold Cherry Tomato Seedlings (see this blog entry) are tall enough that they are ready to place into the ground. I think that the weather is warm enough that the plants will not get damaged by any cold weather.

In a previous blog entry, I showed how I put up the Texas Tomato Cages.

In this blog entry, I'll show you how I transplant the Cherry Tomato Seedlings.

The picture to the right, shows the area of my Raised Bed that I plan to put the Cherry Tomato seedling.


The first thing I do is to dig a hole about 1 feet deep and wide enough so that I can put in a 4" container.


I then pour a cup of Fish Bone Meal into the hole and along the side.

Fish Bone Meal is very high in phosphorous, which is an essential element that enables plants to produce flowers. You can use Bone Meal instead of Fish Bone Meal if you want.


The picture to the right shows the Cherry Tomato seedling that I want to transplant.


There were a couple of side shoots near the bottom of the seedling. I cut off these side shoots (see picture to the right) since they were going to get buried and used them to clone additional Cherry Tomato plants (see this blog entry).


The picture to the right shows the root structure of the seedling.

You can see the roots just beginning to curl at the bottom of the container.

This tells me that this is the right time to transplant the seedling. If I wait too much longer the roots will cover the outer edge. This would constrain the roots from branching out and get nutrients for the plant.


I put the seedling into the hole.


The picture to the right shows how the seedling looks after I cover up the hole with dirt.

It is half the height as before. I plant the seedling this deep to ensure that the plant develops a good root structure.

Cherry Tomato Plant Spacing

For the past several years, I have struggled with how many Cherry Tomato Plants to put into my 10 foot long Raised Bed.

Two years ago, I packed 5 Cherry Tomato plants into this Raised Bed (see picture below)

This was not a good idea.

One of the Cherry Tomato plants got diseased and since the plants were so close together, the disease spread. You can see brown and curled up leaves on the plant to the far right in the picture above.

In order to save my Cherry Tomato crop, I had to destroy two of the Cherry Tomato plants.

Last year, I decided to spread out the Cherry Tomato plants and only put 4 plants in the Raised Bed. As you can see in the picture above, the branches of the Cherry Tomato plants spread out and soon intermingled. Fortunately, none of the plants developed any disease, but the plants were too close together.

This year, I am spreading the Cherry Tomato plants further apart and am only putting 3 plants int the Raised Bed (see picture below). This gives 2 feet of separation between each Cherry Tomato plant.


Cloning a Cherry Tomato Plant

I gave some of my Sun Gold Cherry Tomato seedlings to my spouse's co-workers. Unfortunately, there were more co-workers than there were available seedlings.

When I was transplanting my Cherry Tomato seedlings (see this blog entry), I noticed that a couple of the seedlings had side shoots near the bottom (see picture to the right).


Since these side shoots were going to get covered with soil, I decided to cut them off and use them to clone more plants for my spouse's co-workers.

The picture to the right shows one of the side shoots in my hand.


The picture to the right shows the side shoot in a 4" container.

As long as the soil mixture stays moist, the side shoot will develop roots and will create a new plant.

Sunday, March 6, 2011

Shriveled Winter Melon Seedlings

The picture above shows Winter Melon seedlings that I started in early February. I started 8 seeds and all germinated.

Unfortunately, the weather is too cold for them. Four of the seedlings have already died.

The ones in the picture germinated last.

I bring the seedlings inside at night, but they need warmer weather.

I started another set of seeds today, in case these die as well.

Two Month Old Cherry Tomato Seedlings

It's been two months since I started my Sun Gold Cherry Tomato plants (see this blog entry) and they are doing very well.

The weather in February was to cold to leave plants out overnight. In the early morning the temperature can drop down to the high 30'sF/low 40'sF.

Depending upon the weather, I have been either leaving the plants outside during the day or putting them on a window sill facing the sun when it is cold.

I am hoping that the weather warms up enough that I can transplant the plants soon. Last year, I was able to start transplanting in mid March (see this blog entry)